

Well, hello there! We are on our great road trip traveling across the U.S. to visit/meet up with family in Montana, Canada, and then down to Missouri and Illinois. That means LOTS of quality time in the car, like we’re talking 5,000 miles worth. Let me show you what has been our little saving grace:


I came across this penny tile over a year ago, and fell in love. I was actually thinking of using it for my entire backsplash in my kitchen, but after talking it over with some wise women I decided to just stick with classic white that would allow me to change my mind about color combos in 7 months or 7 years.
So, instead….I decided to tile the back of one of my kitchen cabinets.
I was inspired by this kitchen from Tom Scheerer in House Beautiful that I featured in a Caught My Eye last year.
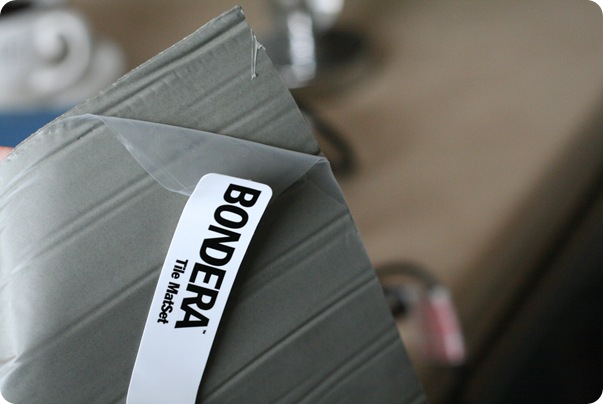
I wanted something easy and removable in case it turned into a total disaster and a guy at the home store said this stuff should do the trick. It’s called Bondera~basically you just cut it with scissors, peel off the back,
put the sticky side against the wall,

peel off the film to reveal more stickiness

put your sheets of tile (cut them with scissors to the right size around the penny tiles) up onto the sticky mesh side (it totally holds it by itself)

and there.you.go.
I was actually pretty impressed and no, I don’t have any kind of deal with this company, but it’s the fastest tile job I’ve ever done. Let it sit 24 hours, and then you can grout. Now, it is kind of pricey~around $40 a roll (this project took 1 roll exactly) I think? BUT I have seen similar products coming out so prices should actually come down on these…
I almost like it better without the grout!

I’m going back and forth between an open cabinet or glass doors (just on this one middle cabinet)…any opinions?

So thrilled that I got my penny tile! White subway tile on the main backsplash is coming…


Someone asked me if I keep the boys out of the living room.
Well….


Thanks to some wonderful advice from you all in the comments of this post, I lined the back of the fabric in the kitchen with black out material (just hot-glued it on!) and used some ring clips. I love the way they hang and slide back and forth now.

And then, using Kate’s method, I made a faux roman shade to go above the other window. I didn’t have dowel rods, so I just folded and made some stitches by hand to hold everything in place. I used upholstery tacks to pin it up on the wall.

Pretty painless… It’s purely for looks~we have a white roller shade behind it. It’s puckering there on the bottom right because of my rad sewing skills, but I’m okay with it because if everything in the kitchen looks perfect, then all of a sudden the dirty dishes and sticky floor and fingerprints look out of place…

The fabric is called Jayda Bramble from Better Homes and Gardens, and I would say this picture is the most accurate for the colors:
I have another fabric I’m using on some light fixtures…coming soon!

Want some more easy diy roman shade inspiration?
Check out these ones from
and
Happy Tuesday~

Subscribe to:
Posts (Atom)
Social Icons