


If anyone is a fool at making yeast bread, it is me! I have never had luck making real bread. My brother, Michael is the bread maker of our family. His is my favorite~I love it. I've tried his recipe and mine tastes nothing like his. I think he adds secret ingredients.
I've tried lots and lots of other recipes and they just don't look good or taste good and take too much time. But, then I came across this one from my alma mater, Utah State (Go Aggies!!) from the extension office and the name intrigued me. I tried it this fall and it turned out awesome! I've been experimenting with adding wheat flour and like it with half wheat/half white. If you're making it for the first time, I would stick with the white flour and then experiment down the road.
My favorite thing about this recipe? It's easy and fast and you probably have the ingredients on hand. You mix it up, let your mixer knead it for you, and then put it in the pans and let it rise. None of this proofing the yeast, letting it rise, punch it down, let it rise again nonsense.
Definitely my kind of recipe. You can have 4 loaves of bread whipped out for your family in no time and feel like Holly Homemaker all at once. It is absolutely divine with the honey butter recipe from Our Best Bites.
** Click here for printable recipe **
or
** Click here for half recipe **
No Fail Yeast Bread
Source: adapted from Becky Low, Utah State University Extension
Cooks do not make homemade bread as they did a few years ago. Today, that treat may seem impossible for the novice cook - but not with this recipe. It is easy, quick to fix, and takes much less time than traditional homemade bread. Recipe makes 4 loaves.
5 cups warm water (I use my tap water as hot as it will go)
3 tablespoon active dry yeast
1 cup honey or 3/4 cup sugar
1/4 cup oil
1-1/2 tablespoon salt
11-12 cups all-purpose flour or bread flour
3 tablespoon active dry yeast
1 cup honey or 3/4 cup sugar
1/4 cup oil
1-1/2 tablespoon salt
11-12 cups all-purpose flour or bread flour
This recipe is easiest if a large mixer is used. If a mixer is unavailable, dough may be kneaded by hand.
By hand: Combine water, yeast, sugar (or honey), oil, salt, and mix together with wire whisk in large bowl. Begin adding flour 1 cup at a time and mix with large wooden spoon until it's too big to stir. Turn dough out on floured surface and continue adding flour 1 cup at a time and knead it in until soft and smooth. Knead for 8-10 minutes by hand.
By hand: Combine water, yeast, sugar (or honey), oil, salt, and mix together with wire whisk in large bowl. Begin adding flour 1 cup at a time and mix with large wooden spoon until it's too big to stir. Turn dough out on floured surface and continue adding flour 1 cup at a time and knead it in until soft and smooth. Knead for 8-10 minutes by hand.
Using Mixer: Combine water, yeast, sugar (or honey), oil, salt, and mix together using dough hook attachment. Stir in enough flour to make a dough that pulls away from the sides of the mixer but is still sticky to the touch


Knead for 8 - 10 minutes in your mixer or by hand. Flour hands and remove from mixer. Place dough onto floured surface and knead until soft and not sticky.


Divide dough into 4 parts. Shape each part into a loaf and place into greased loaf pans. Cover and allow to rise until dough is 1 inch above pans.

* another note from Melissa on this one: I heat my oven to 170 degrees and then I put my dough in the pans in there to let it rise in a warm, protected spot (away from my kids!) It rises more quickly for me this way as well. (usually just about 30 minutes!) When they have risen I keep them in the oven and just switch the temperature to 350 and bake.


* another note from Melissa on this one: I heat my oven to 170 degrees and then I put my dough in the pans in there to let it rise in a warm, protected spot (away from my kids!) It rises more quickly for me this way as well. (usually just about 30 minutes!) When they have risen I keep them in the oven and just switch the temperature to 350 and bake.


Heat oven to 350 degrees F. Bake for 25-30 minutes. Turn out of pans to cool.

NOTE: A nice variation is to make sweet rolls. Take 1 or 2 of the pieces of bread dough divided to make a loaf. Roll each portion of dough out into a 14 x 8-inch rectangle on a lightly floured surface. Brush with 1-2 tablespoons softened butter, then sprinkle with cinnamon and sugar. Roll up dough. Cut into 1-inch slices and place on greased baking pan. Allow to rise until double in bulk. Bake as above. And of course you've got to top them with some frosting!
** Click here for printable recipe **
OR
** Click here for half recipe **
** Click here for printable recipe **
OR
** Click here for half recipe **
Want some more recipes? Here are some favorites:

How about a sink? Have you ever broken a sink before?
Oh, goodness, I'll tell you the ugly story:
Oh, goodness, I'll tell you the ugly story:
On Thursday I'm trying to put finishing touches in the bathroom~hanging the mirrors, etc. I found these knobs at Hobby Lobby for $2 and thought they would look great to "hang" the mirrors from with some big fat ribbon. (hang the mirrors, and then make it look like they were hanging from these:)
 They are big, fat, beautiful and heavy. So, I hung the mirrors, and then I wanted to position the ribbon and the knobs just right, so I took the screws out and put a bunch of hot glue on the back to hold them in place while I hung the ribbon. I wanted my husband to help me put the screws in with some drywall anchors later. Well, of course there were a million other things going on that day: pricing everything for the yard sale, getting it over to my friend's house for the sale, my daughter had a performance at a PTA meeting, and then on top of it, we had our first tornado watch since we've been in Texas. I've never seen such big hail in my life and there were some twisters outside of town that were coming down from wall clouds they were worried would touch down. Yikes!
 I completely forgot about my knobs hot glued up there. There was really loud thunder and lightning all night and sometime in the middle of the night I heard a big *crash.* I was exhausted and out of it and thought it was thunder. My husband was in the kitchen burning the midnight oil preparing for classes the next day and heard it and came in and asked if everything was ok, I said yea, it was just thunder. I wake up the next morning groggy-eyed and see a big black mark in the sink:
I go to wipe it off, but my finger goes right through it!! Yes, it was a hole. That beautiful knob fell from way up high, and smashed right through the sink. I'm sure the humidity from the thunderstorm didn't help anything either. The knob didn't have a mark on it, but the sink sure did. Ugghhhh. Adventures of Melissa in re-modeling...
 The yard sale was a huge success, but guess where my money will be going?
a new sink.
I don't know if you can see in the picture, but there are cracks all around it, so I think fixing it is out of the question.
Do you think those knobs will be going up?? Oh no, I'm afraid they are banished from the house.
I'll have some "Having a Yard Sale" posts up later this week....I'm not going to break anything else, I'm not going to break anything else...

Do you think those knobs will be going up?? Oh no, I'm afraid they are banished from the house.
I'll have some "Having a Yard Sale" posts up later this week....I'm not going to break anything else, I'm not going to break anything else...

First of all, thank you so much for all of the great tips for the spray paint bubbling. I think I was spraying way too close and it probably wasn't completely dry yet either. If those plates ever make it up onto my wall it will be a miracle...
Anyway! I ran to Target this morning to grab some more yard sale stickers (I'm joining my friend that is having one this weekend) and do you think that's all I walked out with?
Oh no...
 They had just marked all of their Easter stuff 75% off. They had some adorable things that could be used for all year around. Look in the kitchen section too~there was an endcap of Easter stuff they hadn't moved over to the Easter clearance aisle yet. See all the bright green tags? Anything with those on it are considered Easter. I usually wait until 90% off, but I didn't want to risk it not being there, so I loaded up.
Also, I need to say thank you to some lovely ladies that have sent me goodies from giveaways I have won. I am on a roll! I think it would be a very good time to go to Vegas if I was the gambling type..
Junk Mammas sent me an adorable chalkboard with a polka dot ribbon, a flower pin,

a sweet stitched bunny towel, and some adorable magnets:
 I also won Nicole's giveaway at Our Cozy Nest and look what I got:
 I love them and still marvel at all the sewing skills out there, of which I have none.
So, thank you again ladies~they were so fun to get in the mail! They both have great blogs and Etsy shops, so go pay them a visit.
Off to find more stuff to sell at the yard sale to make up for what I spent this morning... :)

I've gotten 3 or 4 emails with people asking why their spray paint bubbles when they're spraying ceramics. I have only had this problem once when I was spray painting in 35 degree weather, so I figured it was the cold. I haven't had any problems as you can see from my roosters, bunny, other plates, etc.
But, yesterday, I'm re-doing my extra plates (75 degrees outside)when I see a spot I missed with the spray paint. I take it back out to the garage to spray a little spot, and look what it did:
 Can anyone explain why this happens?? The other plate didn't do this, I used the same paint, etc. etc.
 I now know what y'all are talking about, so I'm throwing it out there and hoping someone can help...

Okay, cheesy title, but I needed to make a filler for my wall since I decided to go ahead and break my plates. Didn't go to yard sales this past weekend (are you proud of me??) so I went ahead and shopped the house...
I found a ring of old keys I found at a random yard sale this winter that my kids love to play jail and zoo with. They love the klinkety sounds of the keys, so I took three off and left two to jingle. We'll see if they notice...
Another framed yard sale picture ($1) I was going to use to make a chalkboard with, but I'm going to use it here instead.
Take them out to my workshop, a.k.a my garage with an old carpet remnant on the ground. The carpet serves 2 purposes: soak up oil from our little old car my husband drives and my spray paint center.

Take them out to my workshop, a.k.a my garage with an old carpet remnant on the ground. The carpet serves 2 purposes: soak up oil from our little old car my husband drives and my spray paint center.
The frame is perfect, don't need to touch that. Spray paint the keys black and when they are fairly dry, I take a fine sandpaper and gently let some of the gold show through to make them look nice and old:

Set the glass and the picture aside, cut the paper to fit the frame, hot glue the paper to the back of the frame:

It looks great just like that, but we're going to add our keys...
 Hot glue them on, and there you have it.
Who needs pretty white plates when you've got cool grungy keys in a frame??
 You see what it's sitting on? The top of my washing machine is my glue gun center.
 You see what it's sitting on? The top of my washing machine is my glue gun center.
Now, back to the title~how cool would this be to frame an old key and give to your dearest one with a note attached that says..."to the one that holds the key to my heart." You could make it all manly with some burlap fabric for the background.
My husband is shaking his head.
OK, what if the guy tied some bling to one of the keys with a cool ribbon with the same note?
And then proposed??
I'm going to sell the rights to the movie...you saw it here first.
Kimm over at Reinvented is having her Trash to Treasure Tuesday~go see what other people are turning their finds into...

Happy Tuesday...

We have 2 winners for the shabby straps giveaway:
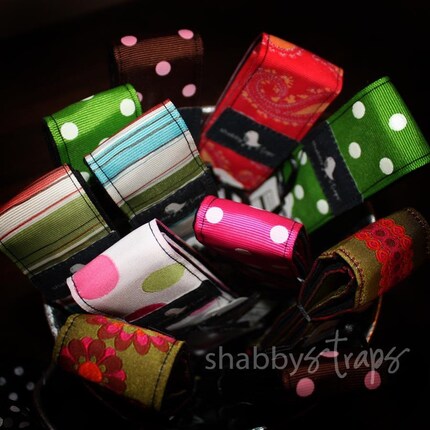
wrist camera strap: #125 Bryanne
larger camera strap: #38 Gordostyle
** Congratulations!! **
Email me at lissylee@hotmail.com with your addresses and I will get these in the mail for you...
Thanks for all of your encouraging comments about my plates. Is it so bad that I didn't even try to glue them or save them for a mosaic?? Out with Friday's trash they went...
There is good news: the package I bought had 4 plates in it, so I have extras, which is a very good thing for this klutzy girl. And, the packages of napkins had 20 in each, so I have plenty of those. I just hate adding something to my to-do list when I've already crossed it off. I love crossing off.
If you haven't had luck finding the napkins at TJMaxx, some of you have reported finding them at Tuesday Morning and Marshall's. Thanks for the tip!
We had a great Easter weekend and I took waaay too many pictures and wore out my camera battery. No pictures today, but I promise there will be some this week~
happy Monday morning to y'all.

 painting by Walter Rane
 "Each of us will have our own Fridays--those days when the universe itself seems shattered and the shards of our world lie littered about us in pieces. We all will experience those broken times when it seems we can never be put together again. We will all have our Fridays. But I testify to you in the name of the One who conquered death--
Sunday will come.
In the darkness of our sorrow, Sunday will come.
No matter our desperation, no matter our grief, Sunday will come...
~Elder Joseph B. Wirthlin
Subscribe to:
Posts (Atom)
Social Icons