
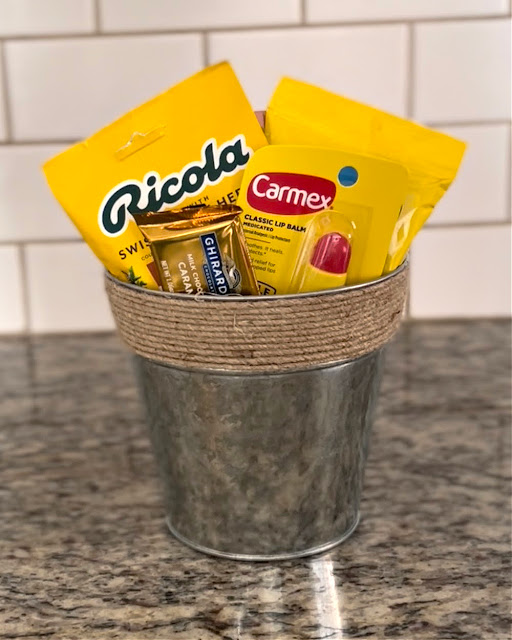
Chances are you know someone who is not feeling well or under the weather. Here is a fun gift you can put together at the dollar store for less than $10 with lots of yellow for some cheer.
Here is a video I shared on Instagram of our dollar store adventure to put together a get well package. My store was still $1 -- the clerk said she thought they would change over in February/March.
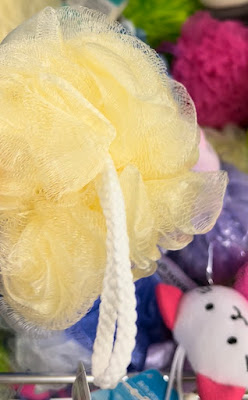 |
| * Loofah |
 |
| * Chamomile tea |
 |
| * packs of purse tissues (use the yellow 💛) |
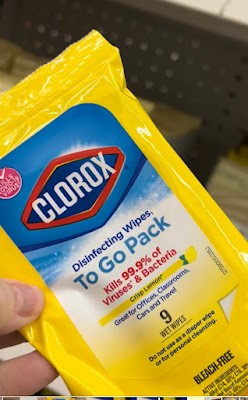 |
| * Clorox wipes lemon to go pack |
 |
| * Ricola (I hope you said Ree-co-laaaaa in the voice) |
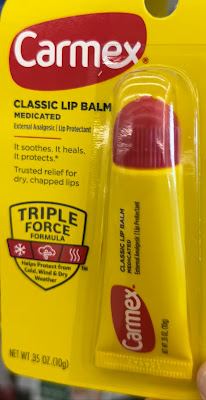 |
| * Carmex lip balm |
 |
| * Ghirardelli Caramel Squares I also have a printable you can add to it -- here it is to download (for personal use only -- thank you!)   |


and attach the print. Do the same thing with the top.

To hang, we just used thumbtacks on the back and tied some jute string around each of them. Then use another thumbtack to hang. If you can't make holes in the walls, mounting putty along the strips would be a good alternative. (Poster print is found here)


First, decide how tall and wide you want your ladder to be for the space it will be in. I made mine the full length, 8ft. and then made the rungs about 16” wide. If you will be using chunky blankets, you will probably want to fold them and measure how wide they are before you cut. Go to Home Depot or Lowes or your favorite lumber store and get 3-4 furring strips for $1.32 each. At my store they are next to the cedar fence boards.Remember, you can have the helpful employees cut them right there for you!

I took 20 minutes to sand them down with my electric sander – I just liked the look better. Here is the sanded on the left and the non-sanded on the right.


Hello friends! I have been wanting to tackle this project for a long time and I’m happy to report that it worked so I’m going to share how to make one of your own in under $10 since you most likely have many of these items around the house. And you don’t have to paint the letters or have a fancy craft cutting machine because we’re using an engineer print that I’m going to give you the free download for!
Materials needed:
* 2 – 1 X 2 X 8 wood boards (furring strips) I got mine for $1.05 at Home Depot – you may want to pick up an extra in case of mistakes. Take time to choose good boards but remember some imperfections are okay, this is more of a rustic frame.
* 2 or 3 foam core boards – I get mine for $1 each at the Dollar Tree
* engineering print picked up at Staples or wherever you like to have them printed (see below) The 24X36 at my store is $3.59
* your choice of stain – I had some leftover from a project and used a mixture of Minwax Provinicial and Minwax Classic Gray
* hot glue
* double stick tape
* finishing nails – I used 1.5 inch in my nail gun. If you don’t have a nail gun, you could use wood screws, just be sure to make pilot holes first so you don’t split the wood.
Here we go:
1. Order your engineering print at Staples or another print shop. The foam boards are 20 X 30 so get the 24 X36 size and we will cut it down. Here is the download for the It’s a Wonderful Life sign and I also included a download for a Joy to the World horizontal option --- Joy to the World vertical --- O Come Let Us Adore Him vertical because I realize everyone in the world may not be as infatuated with that movie like my family is. Just upload the image to Staples and then choose the 24X36 in black and white in the horizontal orientation and pick it up in the store.

2. Hot glue the foam boards together. I used two, you could add another if you want your sign to be thicker.

3. Place your print on top of the foam boards and make creases where you want to cut.

4. Cut the print and then attach it to the foam boards with double stick tape.

5. Line up your boards along the foam core and mark where you want to cut. If you don’t have a power saw, you could pre-measure and have them cut at the store. Mine were 20 1/8” for the shorter sides and 31 3/8” for the top and bottom pieces. Double check to be sure they all line up.


6. Stain the boards. I use a disposable foam brush and made a custom mixture of Minwax provincial and Minwax classic gray until it looked right. I brush it on and then wipe off with a paper towel. Let dry completely, usually outside or in the garage so you don’t have to smell it.

7. Then, nail the boards together with your nail gun, or you could use wood screws – just make sure you make pilot holes first so you don’t split the wood. The boards just kind of hold the foam core and print in.

And there you go!! Be so proud that you saved some major money! Prop it up on a mantel or shelf or add a hanger on the back if you will be displaying it on the wall.

Here is one to pin for later:

Thanks for stopping by, feel free to leave any questions in the comments below! Oh, and yes! A few of you noticed that the pine garland – it is indeed from Chip & Joanna’s Hearth & Hand line at Target. ♥

Social Icons